This post contains affiliate links
First off let me say I am horrible with electronics… I had to ask my fiance the other day how to delete a document from word…not over exaggerating. If you are too this should help you easily start a blog.
I have watched a million YouTube videos, Pinterest post, blogs posts on How to start a blog and feel like these were the things that helped me the most. I was so frustrated when trying to start mine I gave up probably two or three times, so don’t give up the more you play around the more it makes sense.
Step 1 – Find your Niche – Make a List of Blogs Posts and Start Writing them in Word.
A lot of “How to Make a Blog” blogs start out by telling you to get a host and domain name. I highly suggest you start by writing some blog posts in Word. I regret not doing this and recommend this for a number of reasons. One, so you can see if you are dedicated enough to put time aside to write them, otherwise you just wasted your money on the host and domain name. Two, because when you are setting up your blog it makes it a lot easier to post multiple at a time so you get the hang of it. Finally, you can make your blog public right away with content on it, and start making money faster. I would suggest having at least 10 blog posts. When I first went to apply for Google Adsense (a service to put adds on your blog to make money) I got denied because my blog didn’t have enough content, so pretty much I was paying for months of having a blog with not enough content.
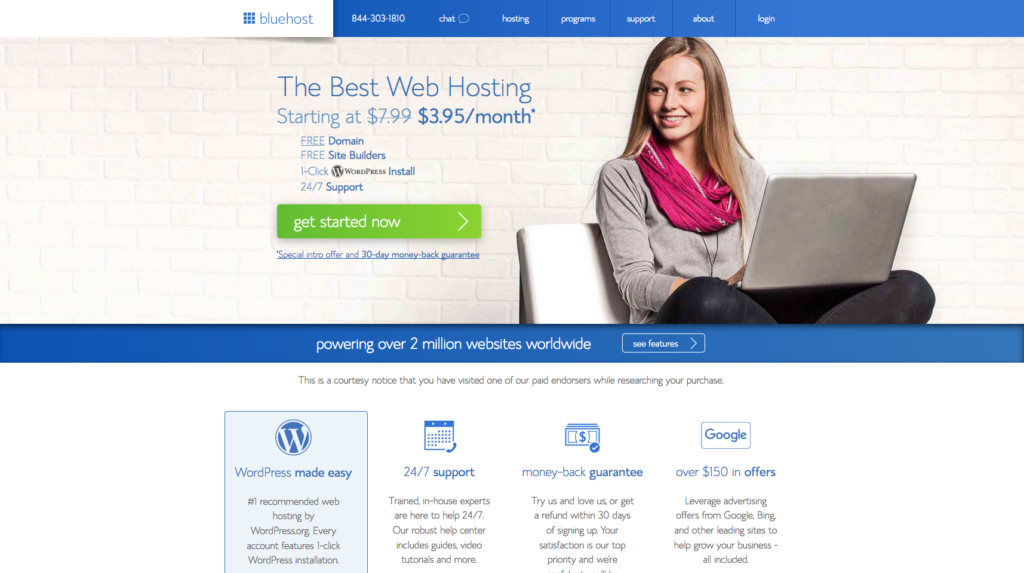
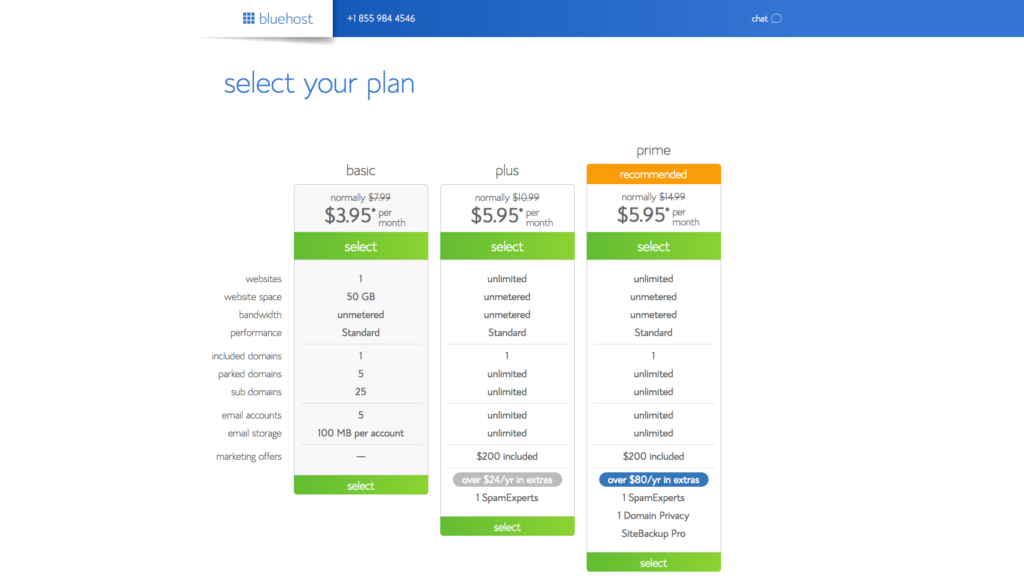
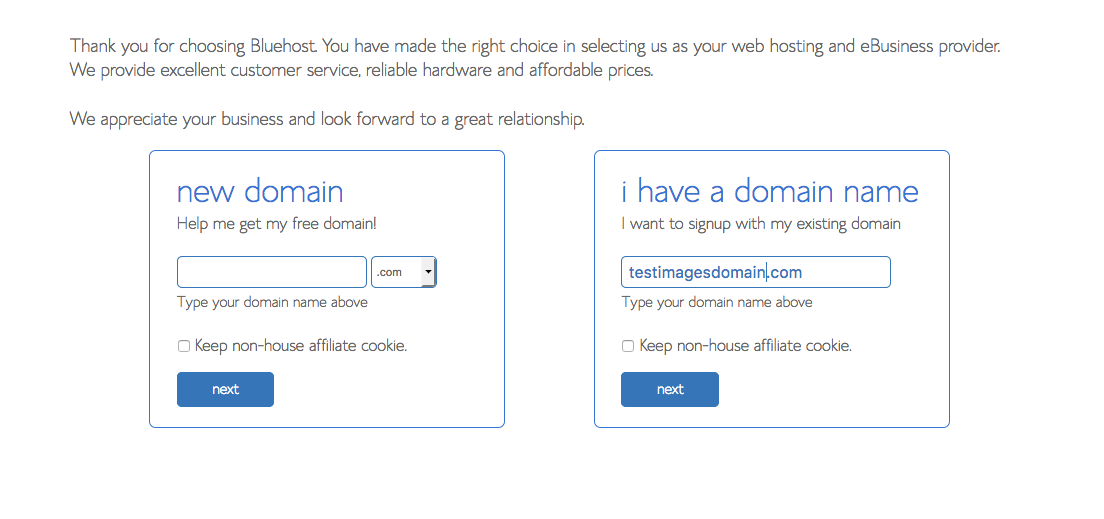
Step 2 – Get a Host and Domain Name.
Write down all of the websites, usernames, and passwords somewhere you can easily access them. There will be plenty of them.
Domain name – your website (ie. www.SarahRachelFinke.com) I paid $11.99/year through Bluehost.
Suggestions!
- Pick something short and easy to remember
- Use .com – Most people using the internet assume .com so even if they remember your blog name they will most likely add .com
- Try to use keywords about your blog topic. For example my Wedding blog is thehomemadebride.com. It’s target audience is about brides and it’s about making homemade decorations and favors. If people type in google those keywords will lead them to my blog.
Host – software to run your website (ie. https://www.bluehost.com/) I paid $3.49/month. Another nice thing about using Bluehost is you can get the host and domain name both from them and not have to worry about linking them.
Login to your Host and download WordPress which is free. You will then access your website to edit it through WordPress. An easy way to always log in to your website is just adding /admin to the URL link. (Ie. SarahRachelFinke.com/admin)
Step 2 – Pick a Theme

On the Sidebar, go to Appearance, Theme, Add new. There are tons of Free themes to choose from or ones with small fees, so you can avoid paying a graphic designer to design your website. I highly suggest picking something basic (at least at first) and easy to navigate. You can then click customize and change any pictures or colors you would like.
Step 4 – Add Plugins and Widgets
Widgets are used to display content usually on the sidebar. If you look on the side of my home page you will see a display of recent posts, search bar, and subscriber list these are an example of a widget. Social media buttons on the posts are also an example of a widget.
Plugins are basically like apps. They are used with WordPress behind the scenes to allow your website to have extra features. Some examples of plugins are used to help prevent spam, track your number or readers and their locations, speed up your blog.
Plugins/Widgets to add
- Page Builder widget – helps you customize each page to look nice but still adapt to all devices, so if someone is looking at your website on the mobile phone all the content still looks normal.
- Download Stop Spammers Plugin to prevent spammers from subscribing
- WP Super Cache- This helps to speed up your blog speed. Search engines look at the blog speeds to know which ones to recommend. Once it’s installed, go to settings – click caching on – update settings
- Yoast SEO –Search Engine Optimization. grades the readability of your blog posts and recommends ways they can be improved to help readers find your content easier on search engines.
- Google Analytics – Tracks how many people come to your blogs and what area they are accessing your blog from.
- List Builder by Sumo Me- This allows you to make a subscribe to my email list pop up which will get you 20% more subscribers. After you install and activate a pop-up arrow will come up with instructions.
Step 5 Adding Posts/Pages/Categories
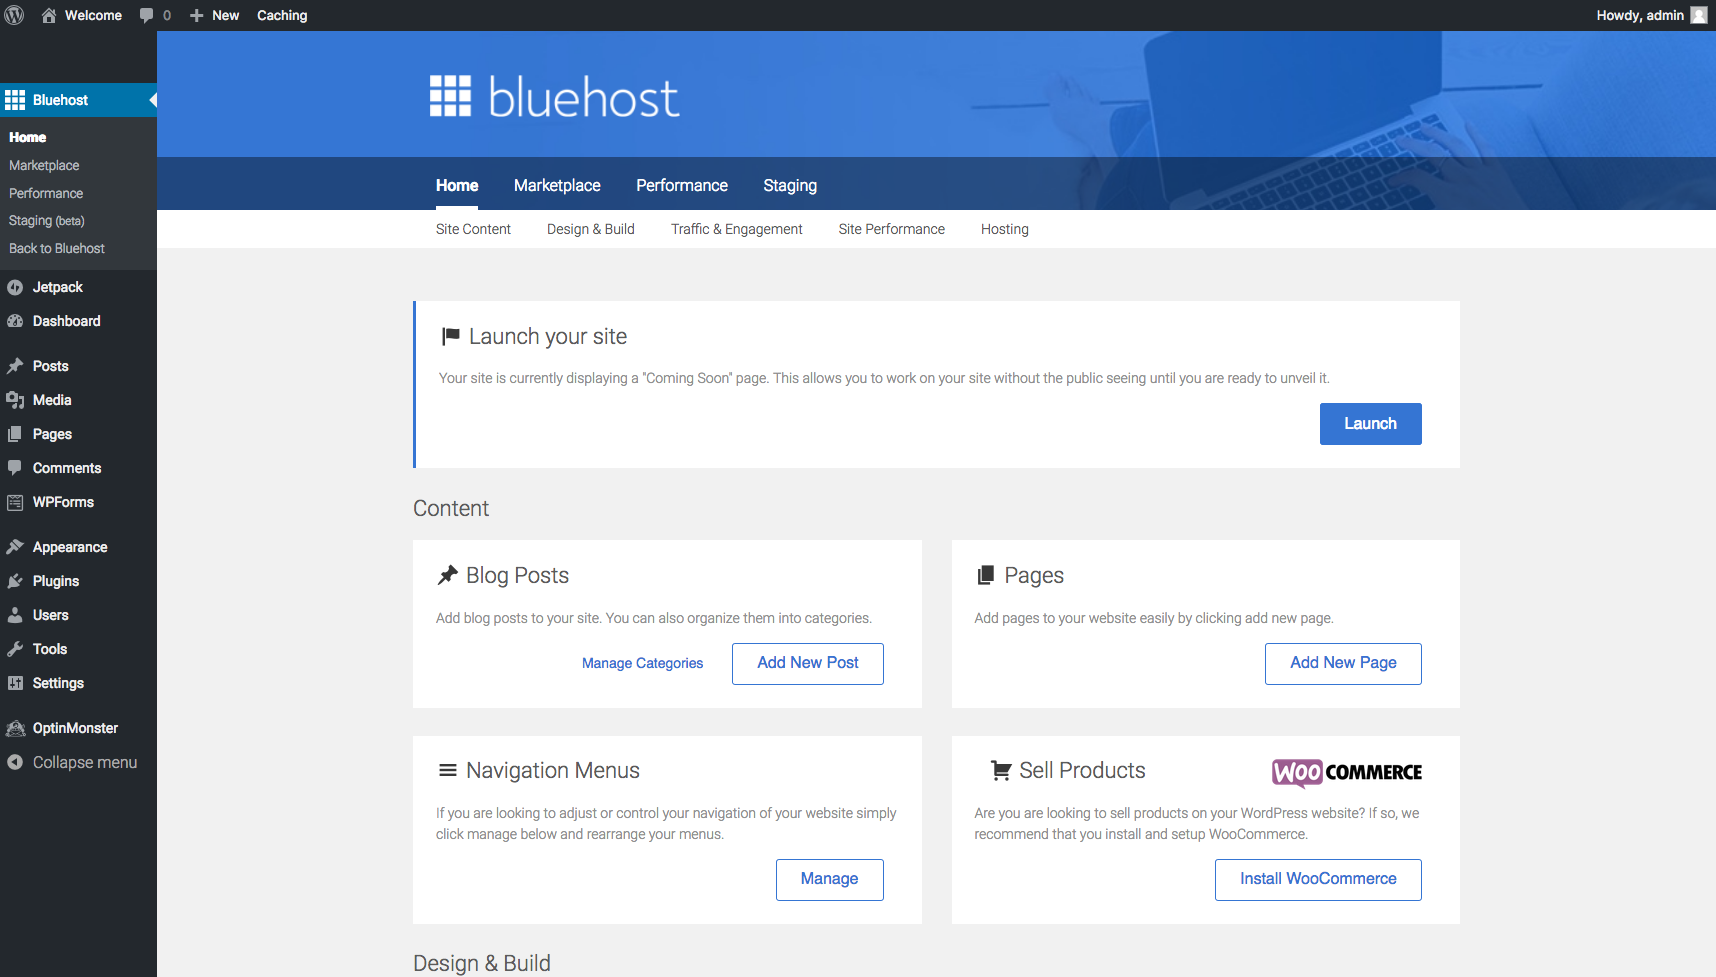
Categories will be on your main menu, with all the different categories your blog posts with fit into.
- To add a Category hover over “posts” on the sidebar and then choose “categories”. There should be right on that page an add new category form you can fill out and then click “add new category”.
Posts have more editing options and can be stacked on the home page. These will be all of your individual blog posts.
- To add a post hover over “posts” on the sidebar and choose “add new.” As long as on the upper right side tab is on “visual”, you can type and format just like in word. The“text” tab will be all of the codes that are automatically filled out, so it can appear how you want it on your page.
- If you want to add a hyperlink in: highlight the word or phrase, click the hyperlink button (if you don’t know what that looks like hover over the icons and it will say “insert/edit link”) on the menu, post the
- After that form is filled out with your post, you will want to link it to a category. On the right side, you will see categories and you can simply check the box under each category you want that post to be under. Once you are finished doing that, click publish.
Pages are simpler and like categories can also be on your main menu bar. These will be more like your “about me” and “contact” pages with information that doesn’t change very often.
- To add a page simply hover over “pages” on the sidebar and click add new, fill out the page, and click publish.
You NEED to set up a website email. I highly suggest sending an email with each new blog post to kick start your shares to social media to get more traffic to each post. MailChimp is a free website that helps you manage subscribers and send out newsletters. It is free for the first 2,000 subscribers. When I first started out blogging, I thought there was no chance I would reach that amount and I doubled it in about a year. This is one of the reasons, I suggest that you have a main topic for your blog. I am all over the place with mine and then subscribers are getting emails of blog posts on all different topics that they don’t care about. If you had a few topics and make a few different blogs you can have a few MailChimp accounts which would allow you to use the free service for a longer period of time.
Grammarly is another tool I highly suggest. I’m pretty bad at spelling and grammar. This tool you can download to your browser and is a better version of spell check. There is a free version and a paid version.
Images
- For images that you are able to use without copy write and sourcing. Search on google images – usage rights – labeled for use or type Wikipedia after whatever image you are searching for
- In my opinion, Images are much easier to upload if you get the WordPress app. You just click the camera button when in the blog post and your picture gallery comes up and you post a pic just like you would to Facebook or Instagram.
Citing Sources
Here is a great website that shows how to cite all types of sources in your blog:
Note:
- It is also helpful to watch YouTube videos on how to make a blog, so you can actually see how things are done. I suggest making a basic blog at first, and then when it makes more sense what everything does you can add more.
- Make sure the youtube videos you are watching are blog focused and not website focused. I first watched this video on how to make a website. I had to put in all these codes and it ended up looking pretty nice. Until I went to put in all my blog posts and I had pages instead of categories. It wasn’t a very blog friendly website, so I ended up deleting it all and starting from scratch.
Hope this Helps 🙂

Easily Start a Blog


Great article with so much helpful nuggets of info! Would you recommend establishing an LLC if you hope to make a little money from the blog via ads, links to products, etc.? I know there’s the risk of being seen by the IRS as treating your blog/website/organization as a hobby if you don’t have enough profit, so wasn’t sure what the advice would be here. Thanks!
I did not start an LLC. I do however save all receipts and document all earnings to be safe. Each place that asks for my tax ID, I just use my SSN. I am definitely no expert in taxes though. If you do have an accountant, I would ask them if they know any pros/cons of establishing the LLC. Good Luck!